
Ok, so this tutorial is like three tutorials in one. We will make an awesome wood emboss, put bullet holes in the wood and finally smoke 'em up to a gnarly Wyatt Earp-just-came-on appearance.
Step 1:
First, we need a wood texture. I used the search tool that searches a large EveryStockPhoto a lot of free image banks to find an image. We must be especially careful at this point PSDTUTS because the agreements to use and what not. This image is ImageAfter (SRC) who were willing to allow you to use their images in commercial projects, yay!

Step 2:
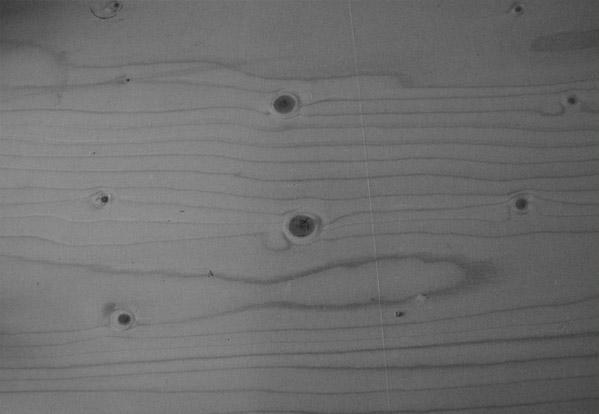
So here's my lovely wood texture!

Step 3:
First, we need some text. In a new layer, add your text in a nice brown color (#803508). The color is important because we're going to set it to Multiply to get a nice darkening of the wood texture behind it.
The font I've used is Anatole Display SSi, it's kind of Western-looking without being too over the top. Use whatever you please.

Step 4:
Basically, next I added a whole bunch of layer styles. Here's how it comes out; in the next step I'll show you all the styles I applied. Before we get to the styles though, there are two settings you need to apply:
- Set the Fill of the layer to 90%. (If you're not sure what Fill is, it's right below Opacity. Opacity controls how transparent everything on the layer is, while Fill controls how transparent only the layer and not the layer styles are)
- Set the layer blending mode to Multiply

Step 5:
Ok there are a bazillion styles here. The main points to take away are:
- Drop Shadow — I've used the drop shadow in an unusual way here. It's set to put a 1px highlight on the bottom right. This is where the light (which in this example we're going to have coming from the top left) hits the edge.
- Inner Shadow — I've used the inner shadow to make it seem like the text is stamped on to the wood.
- Inner Glow — This is used to give a general stamped-in look on top of the inner shadow.
- Bevel / Emboss — I've used this to double-over the drop shadow highlight and give it even more of an embossed feel.
- Gradient Overlay — This is used just to give a bit of variation in the color of the item it's applied to.


Step 6:
Now this is looking pretty good. One problem, though, is it's a bit too clean cut. It would be nicer if the text looked a bit worn down. To do that, we'll apply a Displacement map. Actually, we're going to do this step quite a few times over during the rest of the tutorial, so it's quite important to learn (and quite simple).

Step 7:
First, create a new file and paste in the wood texture. Press Ctrl+Shift+U to desaturate it and then save it as Displacement.psd

Step 8:
Now back on the main file, duplicate the Wanted text. Rasterize one copy by going to Layer > Rasterize > Type. Then set the other non-rasterized layer to 40% Fill. Then switch it off for the time being so it doesn't get in the way. Now back to the rasterized version, go to Filter > Distort > Displace and use values of 5 and 5 for the scale as shown below. Press OK and then it will ask you what file to use as the displacement map, choose Displacement.psd from the previous step. You can read a bit about displacement maps and how they work in this post at Worth1000. They can be quite powerful. For our purposes, we're mainly using them to roughen up edges to match the background.

Step 9:
Now we switch the other non-rasterized layer back on, and together they make a rougher-looking version of the original.

Step 10:
Now I wanted to add some shapes and more text to embellish my wanted text. I used Photoshop shapes like stars and added some extra text below. Then I just copied steps 4-10 for each one. The one difference is that because the objects/text is smaller, I adjusted the layer styles to suit. So, for example, I made the inner shadow 1px instead of 3px for the distance, and so on.

Step 11:
So here we are. It's looking pretty cool already! But to make this image really kick, we're going to need a bit more bazoomph!
At this point, I selected all the layers so far except the background wood texture and stuck them in a Layer Group and called it Wanted Text or something like that. The utility of this is that I can now switch it on or off while doing the other parts of the image without it getting in the way. I suggest you do the same.

Step 12:
So with the Wanted Text group switched off for the time being, it's time to make the bullet holes. First, we create two new layers. On the lower one, we draw a largish circle of grey. Then in the upper layer, we draw a smaller circle of black. You should have something like shown. The idea here is the black bit will be the actual hole; the grey bit is going to be the roughed-up wood texture around the hole.

Step 13:
Now we need some neat layer styles to make this work. Here I've applied them already; in the next steps I'll show you the actual settings.
Note that the bullet-hole part is set to Normal and 100% Opacity / Fill, but the outer circle is set to Screen, 100% Opacity, 30% Fill.

Step 14:
For the bullet hole part it's really simple, we use an Emboss with these settings. Note that the highlight I've used a beige color that I picked out of the wood texture so it would match.

Step 15:
The back layer is more complicated. The main points to notice are:
- I've used the Drop Shadow in the same way as with the text earlier (i.e. to create a highlight) but much fainter this time
- I've used Color Overlay to lighten it up
- I've used the Gradient to make it seem indented
- I've used Inner Shadow to generally make it seem depressed


Step 16:
Now that we've got our main bullet hole, I suggest making a layer group out of it, then duplicating this layer group. Because all our bullet holes need to look different, we need a bunch of these and then we apply some randomizing stuff (like displacement maps and wave distortions) to each of them, in turn, to make them different. So duplicate the pair of layers. Then select the black hole layer and go to Filter > Distort > Displace. Again use the same Displacement.psd as your map. This time I set the scale to 10,10.

Step 17:
Next, we select the back layer and apply Filters > Distort > Wave transform. You may need to fiddle with the settings, as you don't want to distort it too much. I've never fully understood the wave tool, I just move sliders around and press Randomize a lot until I get the look I want ... makes you wonder if I should be teaching Photoshop really :-)

Step 18:
After that, apply a Filters > Distort > Displace to this backing layer too. This time use a scale of 50,50 to make it really rough (see image).
Additionally, I found that because of the wood texture it actually looked best when I placed the bullet holes on the natural grooves of the wood. You can see an example below where I have the same bullet hole layers in two different places on the wood. The right one looks more natural because it uses the texture to good effect.

Step 19:
Now we do this whole bullet thing a few times over. Make sure to move them around and then use the displacement maps so that they come out differently. Also make sure to press "Randomize" on the wave distortion so again they come out differently. Here's what I've got now...

Step 20:
One drawback to the current image is it looks flat, so it'd be a good idea to apply a bit of lighting and shadow. I put all the bullet layers into a Layer Group called Bullets, and then in a brand new layer above all the others, we draw a Radial Gradient going from White to Transparency as shown.

Step 21:
I then set that layer to Overlay and 50% Opacity, then duplicated it and set the duplicate to Soft Light and 50%. This gave me a nice subtle lighting as shown below.

Step 22:
Next, I duplicated the very back texture layer, pressed Ctrl+Shift+U to desaturate, placed it above all the other layers, and then set the layer to Overlay and 40% opacity. This basically ups the contrast on the image.
Step 23:
This is it so far — already looking much better!

Step 24:
Now create one more layer above the others and draw a Radial Gradient going from white to black, looking something like this. You don't want too much black because that's going to be the shadowy part.

Step 25:
We set this latest layer to Soft Light and 50% Opacity, and finally we have a nice lighting effect. All of a sudden our image is really coming to life.

Step 26:
We have one last mission, and that is to add smoke! For this effect we're going to use the smoky effect. First create a new layer and with a small soft brush, just draw in some wavy lines like shown.

Step 27:
Next, we go to Filters > Distort > Wave and mess about to make a nice wave distortion. When that's done we press Ctrl+F to redo the same filter (the wave) again a couple of times to make it look even more distorted. Occasionally use the eraser to erase bits that are looking weird.

Step 28:
Basically, we repeat those steps over a few times, fade out the layer, do it again with another one, and you'll get some small smoky waves like this.
Just keep going and make a bunch more to add to the other bullet holes. You can learn a bit more about the effect in the supernatural tutorial that I linked to earlier.

FINAL IMAGE
And voila! One awesome Wild West Photoshopped-to-the-max image. Hope you enjoyed the tutorial and learned something useful, or failing that, at least found out where to get good wood textures :-)


0 komentar:
Posting Komentar